
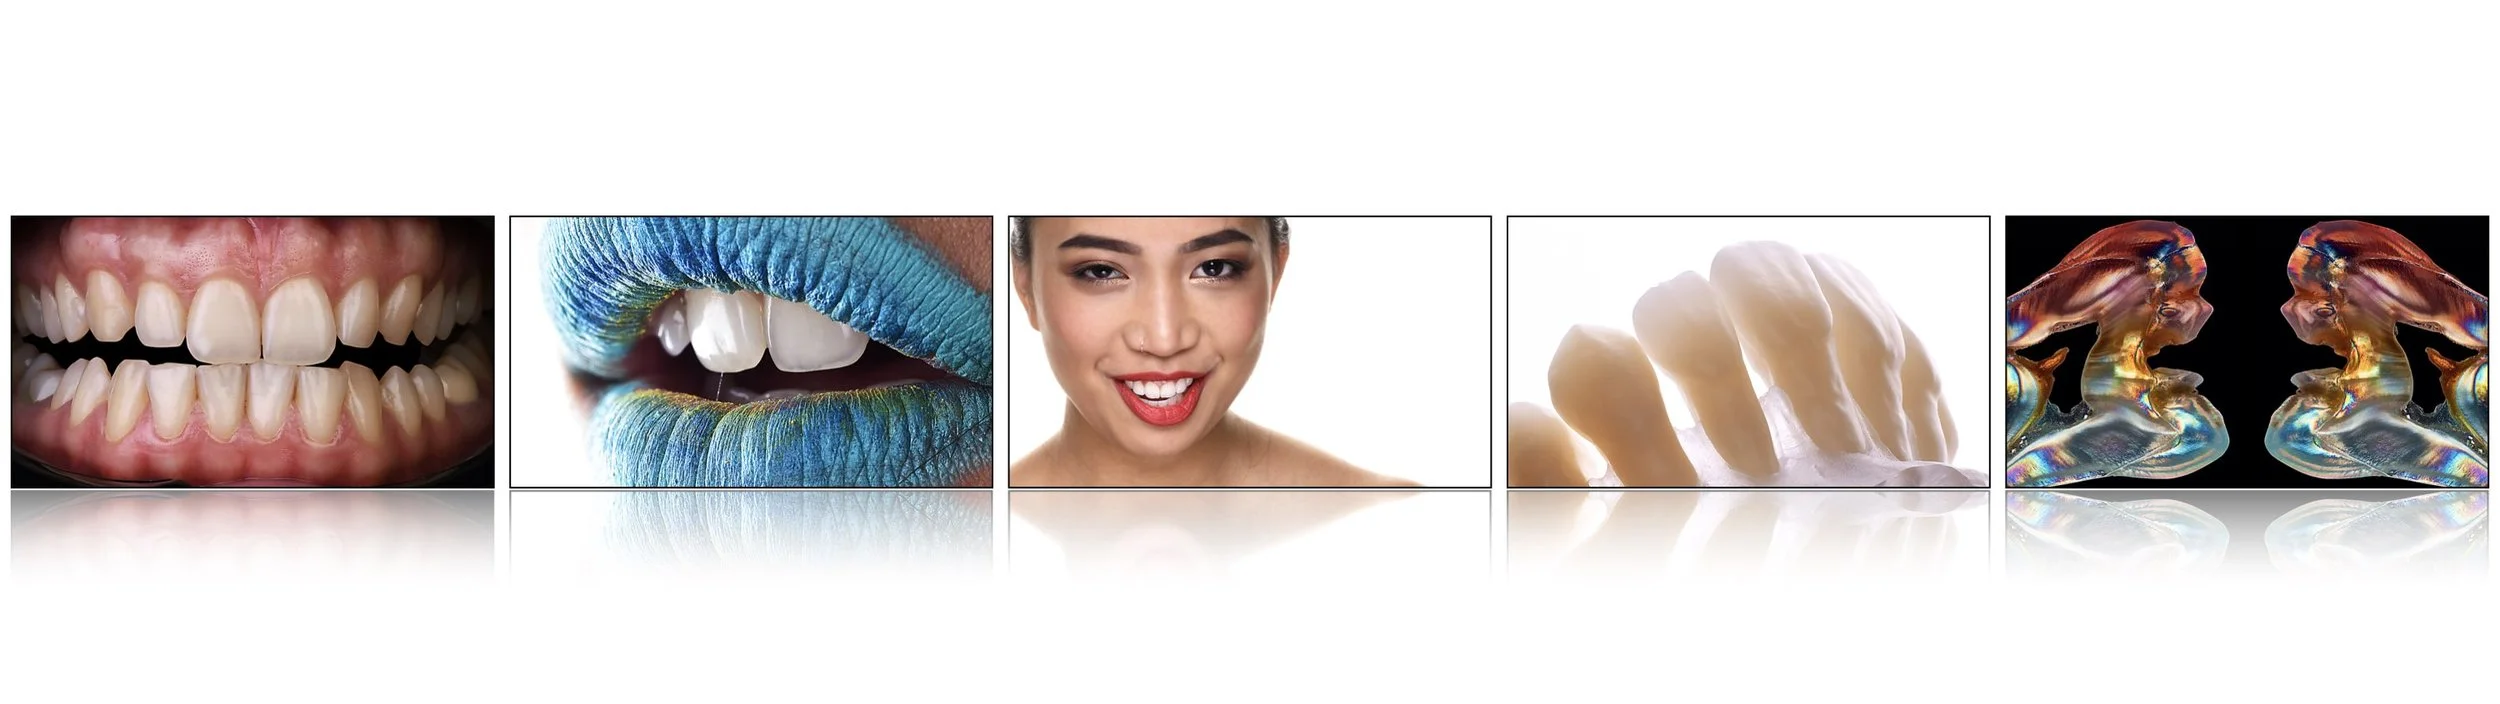
Types of dental photography
Many are using just a very limited types of dental photography, like classic documentation, or ortho photos, or shade photos in their office. In the following article we will discuss more types and their use in daily practice.
Main categories are:
Intraoral photography
close-up photography
portrait photography
laboratory photography
crosspolarization photography
All those categories have subcategories and you can find out more detail by taking one of our on-line courses or purchasing The Book.
INTRAORAL DENTAL PHOTOGRAPHY
When we talk about intraoral, those can be normal documentation photos, surgery photos, optragate chairside photos, shade & color photos. In order to have best results you need to follow instructions and use proper lights to each type of categories. Best choice probably Godox Twin Flash with proper accessories to achive high end quality or studio flashes.
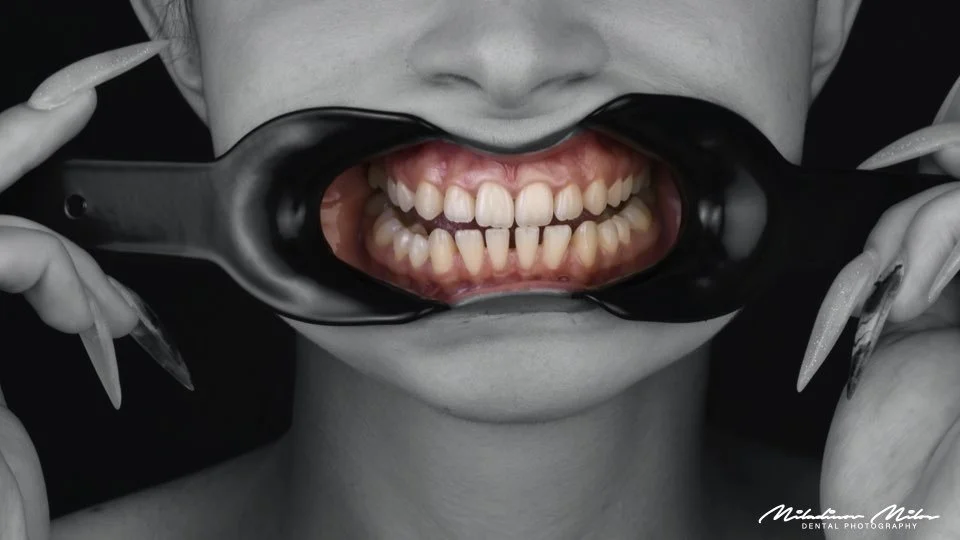
TYPES OF DENTAL PHOTOGRAPHY
A Complete Guide to Intraoral, Close-Up, Portrait, Laboratory, Cross-Polarized & Shade Photography
What are the main types of dental photography?
Dental photography is much more than taking standard intraoral photographs for patient documentation.
In my dental photography workflow, I divide professional dental photography into several major categories:
1. Intraoral Photography
2. Close-Up Photography
3. Wide Close-Up Photography
4. Portrait Photography
5. Dental Laboratory Photography
6. Cross-Polarized Photography
7. Tooth Shade Photography
8. Before & After Dental Photography
Each type of dental photography has a different purpose, composition, lighting technique, camera setting, and clinical application.
A modern dental practice can use these photographs for clinical documentation, treatment planning, dentist–laboratory communication, patient education, cosmetic dentistry, before-and-after comparisons, lectures, publications, and social media content.
Understanding the different types of dental photography allows dentists and dental teams to choose the right photograph for the right purpose.
⸻
1. INTRAORAL DENTAL PHOTOGRAPHY
Intraoral photography is the foundation of clinical dental photography.
Intraoral photographs show the teeth, gingiva, occlusion, and other structures inside the patient’s mouth while minimizing distractions from the lips and surrounding facial structures.
These photographs are commonly created using cheek retractors, intraoral mirrors, contrastors, a macro lens, and a ring flash or twin flash system.
What is intraoral photography used for?
Intraoral dental photography can be used for:
* Clinical documentation
* Initial patient records
* Treatment planning
* Orthodontics
* Cosmetic dentistry
* Prosthodontics
* Periodontics
* Implant dentistry
* Restorative dentistry
* Before & after documentation
* Dentist–laboratory communication
* Patient education
A standardized intraoral photography protocol also makes it possible to compare the patient’s condition at different stages of treatment.
⸻
STANDARD INTRAORAL DENTAL PHOTOGRAPHS
A complete intraoral series should document the patient’s teeth and occlusion from several standardized views.
Typical intraoral photographs include:
Frontal View
The patient is photographed in maximum intercuspation with the lips and cheeks retracted.
Right Lateral View
Shows the right side of the patient’s occlusion.
Left Lateral View
Shows the left side of the patient’s occlusion.
Maxillary Occlusal View
An intraoral mirror is used to photograph the upper dental arch.
Mandibular Occlusal View
An intraoral mirror is used to photograph the lower dental arch.
Additional photographs can be added according to the clinical situation.
Consistency is extremely important.
Patient position, camera angle, magnification, lighting, retractors, and framing should remain as standardized as possible when photographs will later be compared.
⸻
2. CLOSE-UP DENTAL PHOTOGRAPHY
Close-up dental photography focuses on a smaller area of the smile and is one of the most important photography techniques in esthetic and cosmetic dentistry.
Unlike standard intraoral documentation, close-up photographs can be designed to show the relationship between:
Teeth • Gingiva • Lips • Smile • Restorations
Close-up dental photography is especially valuable when documenting veneers, crowns, composite restorations, tooth morphology, surface texture, gingival architecture, and esthetic treatment outcomes.
Close-up dental photography is ideal for:
* Cosmetic dentistry
* Veneers
* Composite restorations
* Smile makeovers
* Dental ceramics
* Before & after photography
* Case presentations
* Lectures
* Publications
* Social media
Lighting becomes particularly important in close-up photography because the objective is often not only documentation but also the representation of shape, texture, translucency, reflections, and three-dimensional form.
For this reason, I often prefer twin flash with light modifiers or studio lighting for advanced close-up dental photography.
⸻
3. WIDE CLOSE-UP DENTAL PHOTOGRAPHY
Wide close-up photography creates a connection between clinical dental photography and portrait photography.
The photograph typically includes the patient’s smile together with more of the lips, lower face, or surrounding facial structures.
This type of photograph is particularly effective for showing how dental treatment integrates with the patient’s overall appearance.
Wide close-up photography can be used for:
* Smile design
* Cosmetic dentistry
* Treatment planning
* Before & after cases
* Patient consultations
* Case presentations
* Social media
* Dental marketing
Wide close-ups can help tell the story of a treatment more effectively than an isolated photograph of the teeth.
⸻
4. DENTAL PORTRAIT PHOTOGRAPHY
Dental portrait photography shows the patient, not simply the teeth.
Portraits are extremely important in modern esthetic dentistry because a smile should always be evaluated in relation to the patient’s face, lips, facial proportions, expression, and personality.
Dental portrait photography can include:
* Full-face frontal portraits
* Natural smile portraits
* Full smile portraits
* Profile photographs
* Three-quarter views
* Black-background portraits
* White-background portraits
* Creative portraits
What are dental portraits used for?
Dental portrait photography is useful for:
* Smile design
* Facial analysis
* Treatment planning
* Cosmetic dentistry
* Orthodontics
* Before & after documentation
* Patient communication
* Professional presentations
* Social media and marketing
Portrait photography usually requires a different lighting strategy from intraoral photography.
For high-end dental portraits, I prefer larger and softer light sources, such as studio flashes with softboxes or octaboxes.
⸻
5. DENTAL LABORATORY PHOTOGRAPHY
Dental laboratory photography is used to document dental restorations, ceramics, models, materials, textures, and laboratory procedures.
As both a dental technician and dental photographer, I consider laboratory photography an important connection between clinical dentistry, dental technology, education, and communication.
Dental laboratory photography can document:
* Veneers
* Crowns
* Dental ceramics
* Zirconia restorations
* Implant restorations
* All-on-X restorations
* Models
* 3D-printed restorations and models
* Surface morphology
* Texture
* Translucency
* Color characteristics
* Laboratory workflows
These photographs can be used for dentist–technician communication, case documentation, lectures, publications, portfolios, education, and social media.
⸻
WHY IS DENTAL LABORATORY PHOTOGRAPHY IMPORTANT?
A dental restoration contains details that can easily disappear in a poorly illuminated photograph.
Surface morphology, texture, translucency, internal characteristics, and color should be represented as accurately as possible.
Professional laboratory photography helps dental technicians document their work and communicate information more effectively with dentists.
It also creates a permanent visual record of restorations that may never return to the dental laboratory after delivery.
⸻
6. CROSS-POLARIZED DENTAL PHOTOGRAPHY
Cross-polarized dental photography is a specialized technique used to reduce or eliminate specular reflections and glare from the surface of teeth.
Normal dental photographs contain surface reflections created by the interaction between the light source, enamel, saliva, and other reflective surfaces.
Cross-polarization uses polarizing filters positioned on the light source and camera lens to control these reflections.
The result can reveal dental information that is difficult to see in a conventional photograph.
Cross-polarized photography can help visualize:
* Internal tooth characteristics
* Translucency
* Opalescence
* Color distribution
* Dentin characteristics
* Enamel characteristics
* White spots
* Cracks and internal features
* Restorative materials
* Shade information
Cross-polarized dental photography is particularly valuable for esthetic dentistry and communication between the dental office and dental laboratory.
⸻
7. TOOTH SHADE PHOTOGRAPHY
Shade photography is used to communicate tooth color and optical characteristics more accurately between the dentist and dental technician.
Simply writing a shade such as “A1” on a laboratory prescription cannot communicate every visual characteristic of a natural tooth.
A professional shade photograph can provide additional information about:
* Tooth value
* Chroma
* Hue
* Translucency
* Internal characterization
* Surface texture
* Incisal characteristics
* Neighboring teeth
A shade tab should normally be positioned close to the tooth being evaluated so that the dental technician can compare them within the same photograph and lighting environment.
⸻
SHADE PHOTOGRAPHY & CROSS-POLARIZATION
Shade photography and cross-polarized photography can work extremely well together.
A conventional shade photograph provides information about the tooth as it normally appears under reflected light.
A cross-polarized photograph reduces surface glare and can reveal additional internal color information.
Using both photographs can improve communication between the dentist and dental laboratory, especially in demanding anterior restorative cases.
⸻
8. BEFORE & AFTER DENTAL PHOTOGRAPHY
Before & after dental photography is one of the most powerful applications of standardized dental photography.
However, a true before-and-after comparison requires more than simply taking two photographs.
The before and after images should be created using the same photographic protocol whenever possible.
That means maintaining consistent:
* Camera
* Macro lens
* Focal length or magnification
* Camera settings
* Lighting
* Patient position
* Camera position
* Background
* Framing
* Retractors and accessories
If the before photograph is created from one position and the after photograph from another, the comparison can become visually misleading.
Standardization makes before-and-after photography much more valuable for clinical documentation, treatment evaluation, patient communication, education, presentations, and ethical marketing.
⸻
CLINICAL VS CREATIVE DENTAL PHOTOGRAPHY
Not every dental photograph has the same purpose.
I generally separate dental photography into two broader objectives:
Clinical Dental Photography
The priority is accuracy, consistency, reproducibility, and documentation.
Examples include:
* Intraoral records
* Orthodontic documentation
* Shade communication
* Treatment progress
* Before & after documentation
Creative & Esthetic Dental Photography
The priority can include lighting, composition, visual impact, storytelling, and presentation.
Examples include:
* Smile close-ups
* Dental portraits
* Ceramic photography
* Artistic dental photography
* Publications
* Lectures
* Social media
A professional dental photographer should understand both.
Documentation tells us what is there. Great photography can also communicate why it matters.
⸻
WHAT TYPE OF DENTAL PHOTOGRAPHY SHOULD EVERY DENTAL OFFICE USE?
At minimum, I recommend that modern dental practices develop a standardized workflow for intraoral photographs, portraits, close-ups, and before-and-after documentation.
Practices focused on cosmetic and restorative dentistry should consider adding:
Wide Close-Ups + Laboratory Photography + Shade Photography + Cross-Polarization
The exact protocol should depend on the type of dentistry performed in the practice.
The important point is to create a repeatable workflow that the entire dental team can follow.
⸻
DENTAL PHOTOGRAPHY FOR DENTAL ASSISTANTS
Dental photography does not always have to be performed by the dentist.
Once a standardized protocol has been established, many routine clinical photographs can be delegated to a properly trained dental assistant.
The dental team should use consistent:
Positions → Angles → Settings → Lighting → Magnification → Accessories → Image Sequence
This makes dental photography faster and more predictable while allowing the dentist to concentrate on diagnosis and treatment.
⸻
PROFESSIONAL CAMERA OR SMARTPHONE?
Modern dental photography can be performed with both professional cameras and smartphones, but they serve different levels of photographic control.
A mirrorless camera with a dedicated macro lens and professional flash system provides maximum control over magnification, aperture, depth of field, lighting, image quality, and standardization.
Smartphones combined with dedicated lighting and positioning systems can be extremely useful for everyday documentation, before-and-after photographs, portraits, video, social media, and fast clinical workflows.
The most important factor is not simply the camera.
A standardized dental photography workflow is more important than owning expensive equipment without knowing how to use it.
⸻
MY MAIN TYPES OF DENTAL PHOTOGRAPHY
INTRAORAL PHOTOGRAPHY
Best for: clinical documentation, treatment planning, orthodontics, restorative dentistry and patient records.
CLOSE-UP PHOTOGRAPHY
Best for: cosmetic dentistry, veneers, composites, gingiva, smile details and esthetic cases.
WIDE CLOSE-UP PHOTOGRAPHY
Best for: smile design, facial integration, treatment presentation and before & after cases.
PORTRAIT PHOTOGRAPHY
Best for: facial analysis, smile design, cosmetic dentistry, patient presentation and professional content.
LABORATORY PHOTOGRAPHY
Best for: ceramics, restorations, dental technician portfolios, dentist–laboratory communication and publications.
CROSS-POLARIZED PHOTOGRAPHY
Best for: reducing glare and visualizing internal tooth characteristics.
SHADE PHOTOGRAPHY
Best for: communicating tooth color and optical information to the dental laboratory.
BEFORE & AFTER PHOTOGRAPHY
Best for: treatment documentation, patient communication, case presentations and standardized visual comparison.
⸻
ABOUT MILOS MILADINOV
These dental photography protocols are based on my experience as a dental photographer, specialized dental technician, author, and international dental photography educator.
I have been teaching dental photography internationally since 2013, including intraoral photography, portraits, close-ups, laboratory photography, cross-polarization, shade photography, smartphone dental photography, equipment, lighting, camera settings, and digital dental workflows.
I am the founder of ToothPic.ai and Shoot Like PRO and the author of two books dedicated to dental photography.
Through ToothPic.ai, my goal is to make professional dental photography simple, standardized, repeatable, and practical for everyday dentistry.
⸻
FREQUENTLY ASKED QUESTIONS
What are the main types of dental photography?
The main types of dental photography include intraoral photography, close-up photography, wide close-up photography, portrait photography, dental laboratory photography, cross-polarized photography, shade photography, and before-and-after dental photography.
Each type has a different clinical, educational, laboratory, or communication purpose.
What is intraoral dental photography?
Intraoral dental photography documents the teeth, gingiva, occlusion, and structures inside the patient’s mouth. Standard views commonly include frontal, right lateral, left lateral, maxillary occlusal, and mandibular occlusal photographs.
What is close-up dental photography?
Close-up dental photography focuses on a smaller part of the patient’s smile and is particularly useful in cosmetic and restorative dentistry. It can document teeth, gingiva, veneers, composites, ceramics, surface texture, and treatment results.
What is cross-polarized dental photography?
Cross-polarized dental photography uses polarizing filters to reduce surface reflections and glare from teeth. It can help visualize internal tooth characteristics and improve shade and laboratory communication.
What is dental shade photography?
Dental shade photography is a standardized method of photographing a tooth together with shade references to communicate color and optical characteristics to the dental laboratory.
Why is dental photography important?
Dental photography provides visual information for documentation, diagnosis, treatment planning, laboratory communication, patient education, before-and-after comparisons, education, publications, and professional presentations.
Can dental assistants take dental photographs?
Yes. Properly trained dental assistants can perform standardized clinical dental photography using an established protocol for camera settings, positioning, lighting, magnification, and image sequence.
Can I use a smartphone for dental photography?
Yes. Smartphones can be used for many dental photography applications when combined with appropriate lighting, positioning, and a standardized workflow. Professional mirrorless cameras with macro lenses provide additional control for advanced clinical and esthetic photography.
Where can I learn the different types of dental photography?
ToothPic.ai provides dental photography education developed by Milos Miladinov through the Shoot Like PRO workflow, covering intraoral, close-up, portrait, laboratory, cross-polarized, shade, smartphone, and before-and-after dental photography.