DENTAL PHOTOGRAPHY CAMERA SETTINGS
RECOMMENDED SETTINGS for dental photography
RECOMMENDED DENTAL PHOTOGRAPHY CAMERA SETTINGS
INTRAORAL PHOTOGRAPHY
Aperture: f/22
ISO: 100
Shutter Speed: 1/160 sec
CLOSE-UP — WHITE BACKGROUND
Aperture: f/16
ISO: 100
Shutter Speed: 1/160 sec
CLOSE-UP — BLACK BACKGROUND
Aperture: f/22
ISO: 100
Shutter Speed: 1/160 sec
PORTRAIT — WHITE BACKGROUND
Aperture: f/9
ISO: 100
Shutter Speed: 1/160 sec
PORTRAIT — BLACK BACKGROUND
Aperture: f/22
ISO: 100
Shutter Speed: 1/160 sec
CROSS-POLARIZED DENTAL PHOTOGRAPHY
Aperture: f/32
ISO: 100
Shutter Speed: 1/160 sec
These settings are practical starting points used within the Shoot Like PRO dental photography workflow. Exact exposure may vary depending on your camera, macro lens, flash system, light modifiers, working distance and clinical situation.
how to set-up camera for dental photography
Dental photography camera settings depend on the type of photograph being taken. For standardized intraoral photography, a practical starting point is ISO 100, 1/160 sec and approximately f/22 with flash. Portraits and artistic close-ups generally require wider apertures, while cross-polarized photography may require smaller apertures or increased flash power to compensate for light loss.
The goal is not to use one setting for every photograph, but to create standardized presets for intraoral, close-up, portrait, laboratory and cross-polarized dental photography.
BEST SETTINGS FOR DENTAL PHOTOGRAPHY
Camera Settings for Intraoral, Portrait, Close-Up, Laboratory & Cross-Polarized Dental Photography
What are the best camera settings for dental photography?
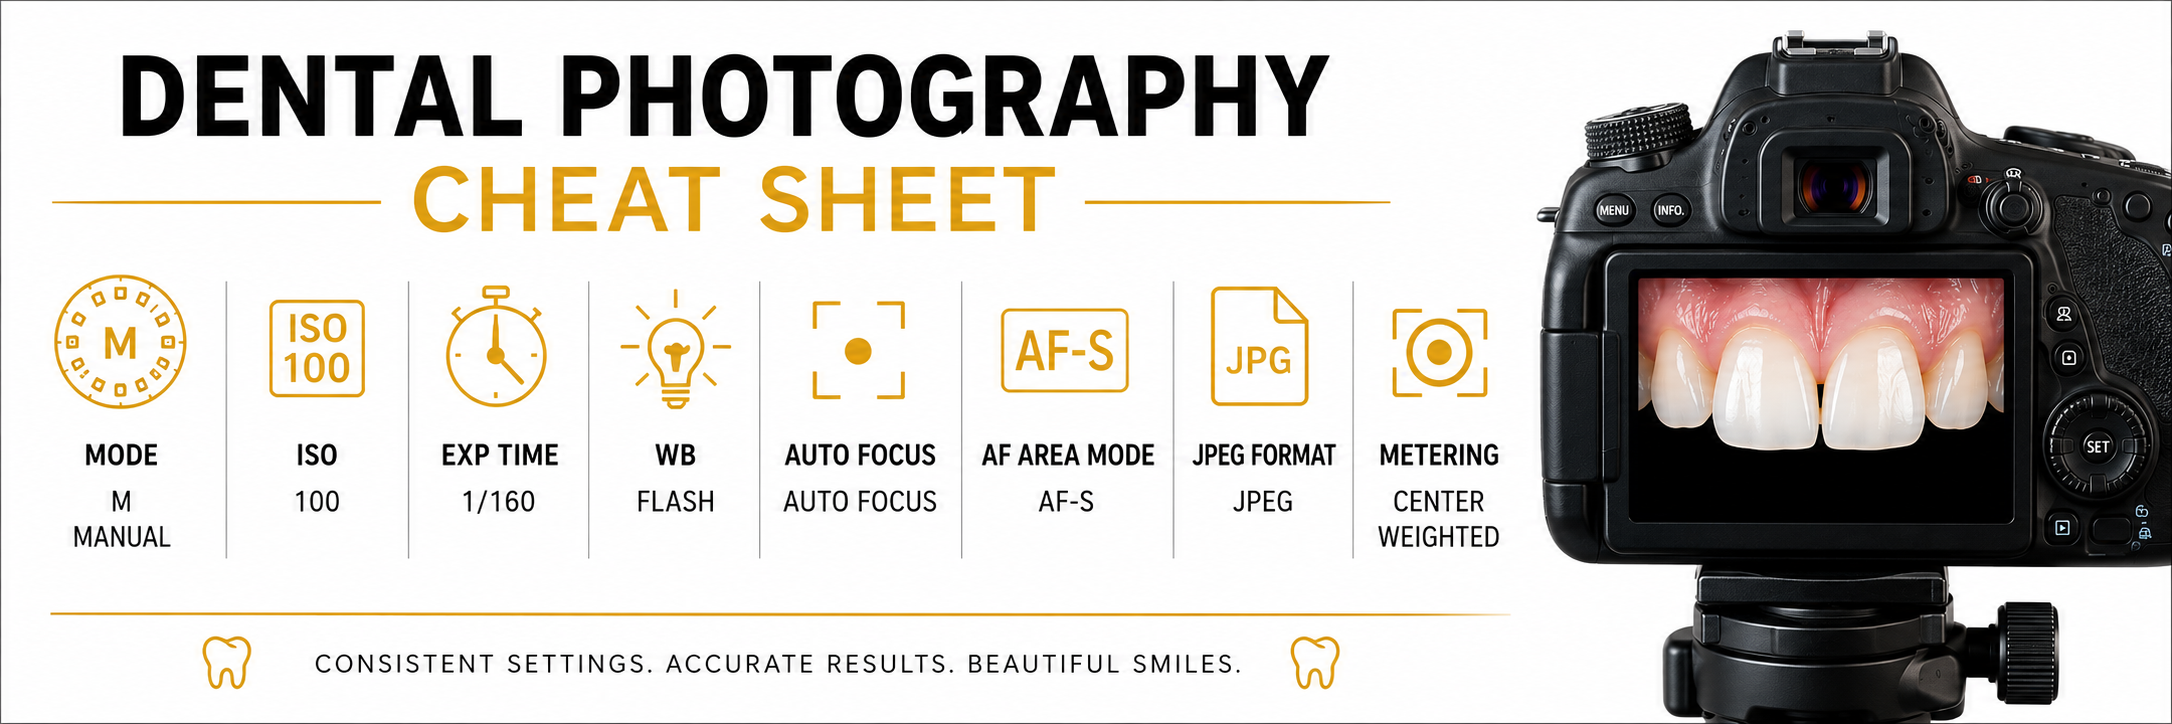
For most of my professional dental photography workflow, I keep the main camera settings consistent and change primarily the aperture — the F-number — depending on the type of photograph I am creating.
My standard starting settings for dental photography are:
Camera Mode: Manual
ISO: 100
Shutter Speed: 1/160 sec
White Balance: Flash
File Format: RAW + JPEG
Then I adjust the aperture according to the type of dental photograph.
My Recommended Dental Photography Apertures
F9 — White-background portrait photography and wide close-up photography
F16 — White-background close-up photography and white-background dental laboratory photography
F22 — Intraoral photography, black-background portrait photography and black-background laboratory photography
F32 — Cross-polarized dental photography on white or black backgrounds
These settings form the basis of my Shoot Like PRO dental photography workflow.
⸻
DENTAL PHOTOGRAPHY SETTINGS CHEAT SHEET
White-Background Portrait Photography
Aperture: F9
ISO: 100
Shutter Speed: 1/160 sec
White Balance: Flash
I use F9 for white-background portraits because portrait photography does not require the same depth of field as intraoral macro photography.
The objective is to keep the patient sharp while creating a clean, properly exposed professional portrait.
⸻
WIDE CLOSE-UP DENTAL PHOTOGRAPHY SETTINGS
Aperture: F9
ISO: 100
Shutter Speed: 1/160 sec
White Balance: Flash
Wide close-up photography shows the smile together with the lips and surrounding facial structures.
I typically use F9 for this type of dental photograph.
Wide close-ups are particularly useful for:
* Smile design
* Cosmetic dentistry
* Before & after cases
* Patient presentations
* Social media
* Treatment planning
⸻
CLOSE-UP DENTAL PHOTOGRAPHY SETTINGS
White Background
Aperture: F16
ISO: 100
Shutter Speed: 1/160 sec
White Balance: Flash
For close-up dental photographs created against a white background, I recommend F16.
Close-up photography is useful for documenting:
* Teeth
* Gingiva
* Veneers
* Composite restorations
* Smile makeovers
* Surface texture
* Tooth morphology
* Esthetic dental cases
F16 provides a good balance between depth of field, detail, and light requirements for this type of photograph.
⸻
INTRAORAL DENTAL PHOTOGRAPHY SETTINGS
Aperture: F22
ISO: 100
Shutter Speed: 1/160 sec
White Balance: Flash
For standard intraoral dental photography, my recommended aperture is F22.
Intraoral photography requires a relatively large depth of field because multiple teeth and dental structures need to appear sharp within the same photograph.
I use these settings for photographs such as:
* Frontal intraoral view
* Right lateral intraoral view
* Left lateral intraoral view
* Maxillary occlusal view
* Mandibular occlusal view
* Anterior teeth documentation
* Restorative cases
* Orthodontic documentation
* Before & after photography
For my workflow, F22 + ISO 100 + 1/160 sec + Flash white balance is the standard starting point for intraoral dental photography.
⸻
BLACK-BACKGROUND PORTRAIT SETTINGS
Aperture: F22
ISO: 100
Shutter Speed: 1/160 sec
White Balance: Flash
For black-background dental portraits, I use F22.
Black-background portrait photography creates a very different visual effect from traditional white-background portraits and can be especially useful for:
* Esthetic dentistry
* Cosmetic cases
* Smile photography
* Professional presentations
* Lectures
* Social media
* Portfolio photography
Lighting and background control are just as important as the camera settings when creating this type of photograph.
⸻
DENTAL LABORATORY PHOTOGRAPHY SETTINGS
White Background
Aperture: F16
ISO: 100
Shutter Speed: 1/160 sec
White Balance: Flash
For dental restorations photographed on a white background, I typically use F16.
This works well for:
* Veneers
* Crowns
* Dental ceramics
* Zirconia
* Models
* Implant restorations
* Dental laboratory cases
Black Background
Aperture: F22
ISO: 100
Shutter Speed: 1/160 sec
White Balance: Flash
For black-background dental laboratory photography, I use F22.
The smaller aperture helps provide the depth of field required for detailed macro photographs of dental restorations.
⸻
CROSS-POLARIZED DENTAL PHOTOGRAPHY SETTINGS
Aperture: F32
ISO: 100
Shutter Speed: 1/160 sec
White Balance: Flash
For cross-polarized dental photography, my recommended aperture is F32.
Cross-polarization reduces reflections and glare from the surface of teeth and can reveal internal optical characteristics that may not be visible in a conventional dental photograph.
Cross-polarized dental photographs are particularly useful for:
* Tooth shade communication
* Dental laboratory communication
* Internal tooth characterization
* Translucency
* Enamel and dentin characteristics
* Esthetic restorative cases
* Veneers and ceramic restorations
Because polarization reduces the amount of light reaching the camera, the photographic workflow needs to compensate accordingly.
In my standardized system, F32 is my starting aperture for cross-polarized photography.
⸻
WHY ISO 100 FOR DENTAL PHOTOGRAPHY?
I recommend ISO 100 as the standard starting point for professional dental photography.
A low ISO helps maintain:
* High image quality
* Fine detail
* Clean color
* Low digital noise
* Better representation of tooth texture
* Better image quality for cropping and presentations
Dental photography is generally performed using controlled flash illumination, so there is usually no need to increase ISO dramatically to compensate for low ambient light.
For my standard dental photography workflow, ISO 100 remains constant.
⸻
WHY 1/160 SEC FOR DENTAL PHOTOGRAPHY?
My standard shutter speed for dental photography is 1/160 second.
When using flash photography, shutter speed is selected partly to work correctly with the flash system and reduce the influence of ambient light.
Using a consistent shutter speed also makes the workflow easier to repeat between different patients and different members of the dental team.
For my system:
Shutter Speed = 1/160 sec
and then I adjust the aperture according to the photograph.
⸻
WHAT WHITE BALANCE SHOULD I USE FOR DENTAL PHOTOGRAPHY?
For my flash-based dental photography workflow, I use Flash white balance.
Consistent white balance is important because dental photographs are frequently used to evaluate:
* Teeth
* Gingiva
* Restorations
* Dental ceramics
* Tooth shade
* Before & after cases
The goal is not simply to make the image look attractive.
Dental photography should reproduce color as consistently as possible.
⸻
SHOULD DENTAL PHOTOGRAPHY BE DONE IN MANUAL MODE?
Yes. For standardized professional dental photography, I recommend using Manual Mode.
Automatic camera modes can change exposure settings from photograph to photograph depending on what the camera sees.
That makes it harder to maintain consistency.
With Manual Mode, you control:
* Aperture
* ISO
* Shutter speed
* White balance
* Flash exposure
* Magnification
This makes the results more predictable and repeatable.
⸻
WHY DOES APERTURE CHANGE IN DENTAL PHOTOGRAPHY?
Aperture controls both exposure and depth of field.
Depth of field is especially important in dental photography because the photographer may need multiple teeth or an entire dental arch to appear sharp.
That is why I do not use one aperture for every type of photograph.
My basic system is:
F9
Portraits and wide close-ups on a white background
F16
White-background close-ups and laboratory photography
F22
Intraoral photography, black-background portraits and black-background laboratory photography
F32
Cross-polarized dental photography
This makes the settings easier to remember and creates a consistent workflow.
⸻
BEST SETTINGS FOR INTRAORAL DENTAL PHOTOGRAPHY
If you are looking specifically for intraoral dental photography settings, my starting recommendation is:
Manual Mode
F22
ISO 100
1/160 sec
White Balance: Flash
This combination is designed to provide the depth of field required for clinical intraoral photography while maintaining consistent image quality.
⸻
BEST SETTINGS FOR DENTAL PORTRAITS
For a white-background dental portrait:
F9 • ISO 100 • 1/160 sec • Flash WB
For a black-background dental portrait:
F22 • ISO 100 • 1/160 sec • Flash WB
The correct lighting setup remains extremely important.
Camera settings alone cannot replace good positioning and lighting.
⸻
BEST SETTINGS FOR DENTAL CLOSE-UPS
For white-background close-up dental photography:
F16 • ISO 100 • 1/160 sec • Flash WB
For more advanced close-up photography, lighting direction, diffusion and positioning should also be adjusted according to the desired result.
⸻
BEST SETTINGS FOR DENTAL LABORATORY PHOTOGRAPHY
For a white background:
F16 • ISO 100 • 1/160 sec • Flash WB
For a black background:
F22 • ISO 100 • 1/160 sec • Flash WB
These settings are suitable starting points for photographing dental ceramics, veneers, crowns and laboratory restorations.
⸻
CAMERA SETTINGS ARE ONLY PART OF THE WORKFLOW
Professional dental photography is not created by camera settings alone.
The final result also depends on:
* Camera body
* Macro lens
* Flash system
* Light modifiers
* Magnification
* Camera position
* Patient positioning
* Retractors
* Contrastors
* Mirrors
* Background
* Light direction
* Diffusion
* Focus
* Standardization
Two photographers can use exactly the same settings and still create completely different results.
The goal is to combine consistent settings with a repeatable dental photography protocol.
⸻
recommended dental PHOTOGRAPHY SETTINGS
WHITE PORTRAIT
F9 | ISO 100 | 1/160 sec | Flash WB
WIDE CLOSE-UP
F9 | ISO 100 | 1/160 sec | Flash WB
WHITE CLOSE-UP
F16 | ISO 100 | 1/160 sec | Flash WB
WHITE LABORATORY PHOTOGRAPHY
F16 | ISO 100 | 1/160 sec | Flash WB
INTRAORAL PHOTOGRAPHY
F22 | ISO 100 | 1/160 sec | Flash WB
BLACK PORTRAIT
F22 | ISO 100 | 1/160 sec | Flash WB
BLACK LABORATORY PHOTOGRAPHY
F22 | ISO 100 | 1/160 sec | Flash WB
CROSS-POLARIZED PHOTOGRAPHY
F32 | ISO 100 | 1/160 sec | Flash WB
⸻
ABOUT MILOS MILADINOV
These dental photography settings are part of the Shoot Like PRO photography workflow developed and taught by Milos Miladinov.
Milos Miladinov is a dental photographer, specialized dental technician, author, international lecturer and founder of ToothPic.ai and Shoot Like PRO.
He has been teaching dental photography internationally since 2013, covering camera settings, cameras and macro lenses, lighting, intraoral photography, portraits, close-ups, dental laboratory photography, cross-polarization, smartphone dental photography and modern digital dental workflows.
Through ToothPic.ai, the goal is to make professional dental photography easier to learn, standardize and implement in everyday dental offices and laboratories.
⸻
FREQUENTLY ASKED QUESTIONS ABOUT DENTAL PHOTOGRAPHY SETTINGS
What are the best settings for dental photography?
My standard starting settings are Manual Mode, ISO 100, 1/160 sec shutter speed and Flash white balance. The aperture changes according to the type of photograph being created.
What aperture should I use for intraoral dental photography?
I recommend F22 for my standard intraoral dental photography workflow, combined with ISO 100, 1/160 sec and Flash white balance.
What ISO should I use for dental photography?
I recommend ISO 100 for most flash-based professional dental photography. It provides excellent image quality, fine detail and low digital noise.
What shutter speed should I use for dental photography?
My standard dental photography shutter speed is 1/160 second when using my flash-based workflow.
What aperture should I use for dental portraits?
I use F9 for white-background dental portraits and F22 for black-background dental portraits.
What aperture should I use for dental close-up photography?
For white-background close-up dental photography, I recommend F16 as a starting point.
What aperture should I use for dental laboratory photography?
I recommend F16 on a white background and F22 on a black background in my standard dental laboratory photography workflow.
What settings should I use for cross-polarized dental photography?
My standard starting settings for cross-polarized dental photography are F32, ISO 100, 1/160 sec and Flash white balance.
Should I use automatic or manual mode for dental photography?
I recommend Manual Mode for professional dental photography because it allows the photographer to maintain consistent exposure settings between photographs, patients and cases.
Do dental photography settings change between patients?
My basic camera settings remain standardized whenever possible. The main setting I change according to the type of photograph is the aperture, while lighting and flash output can be adjusted as necessary for the specific setup.
CHECK DENTAL PHOTOGRAPHY GUIDE
SHOOT LIKE PRO - WORKFLOW & SETTINGS
These settings are starting points used within the Shoot Like PRO dental photography workflow. Exact exposure can vary depending on the camera, macro lens, flash system, light modifiers, working distance and clinical situation.