
Best lights in dental photography
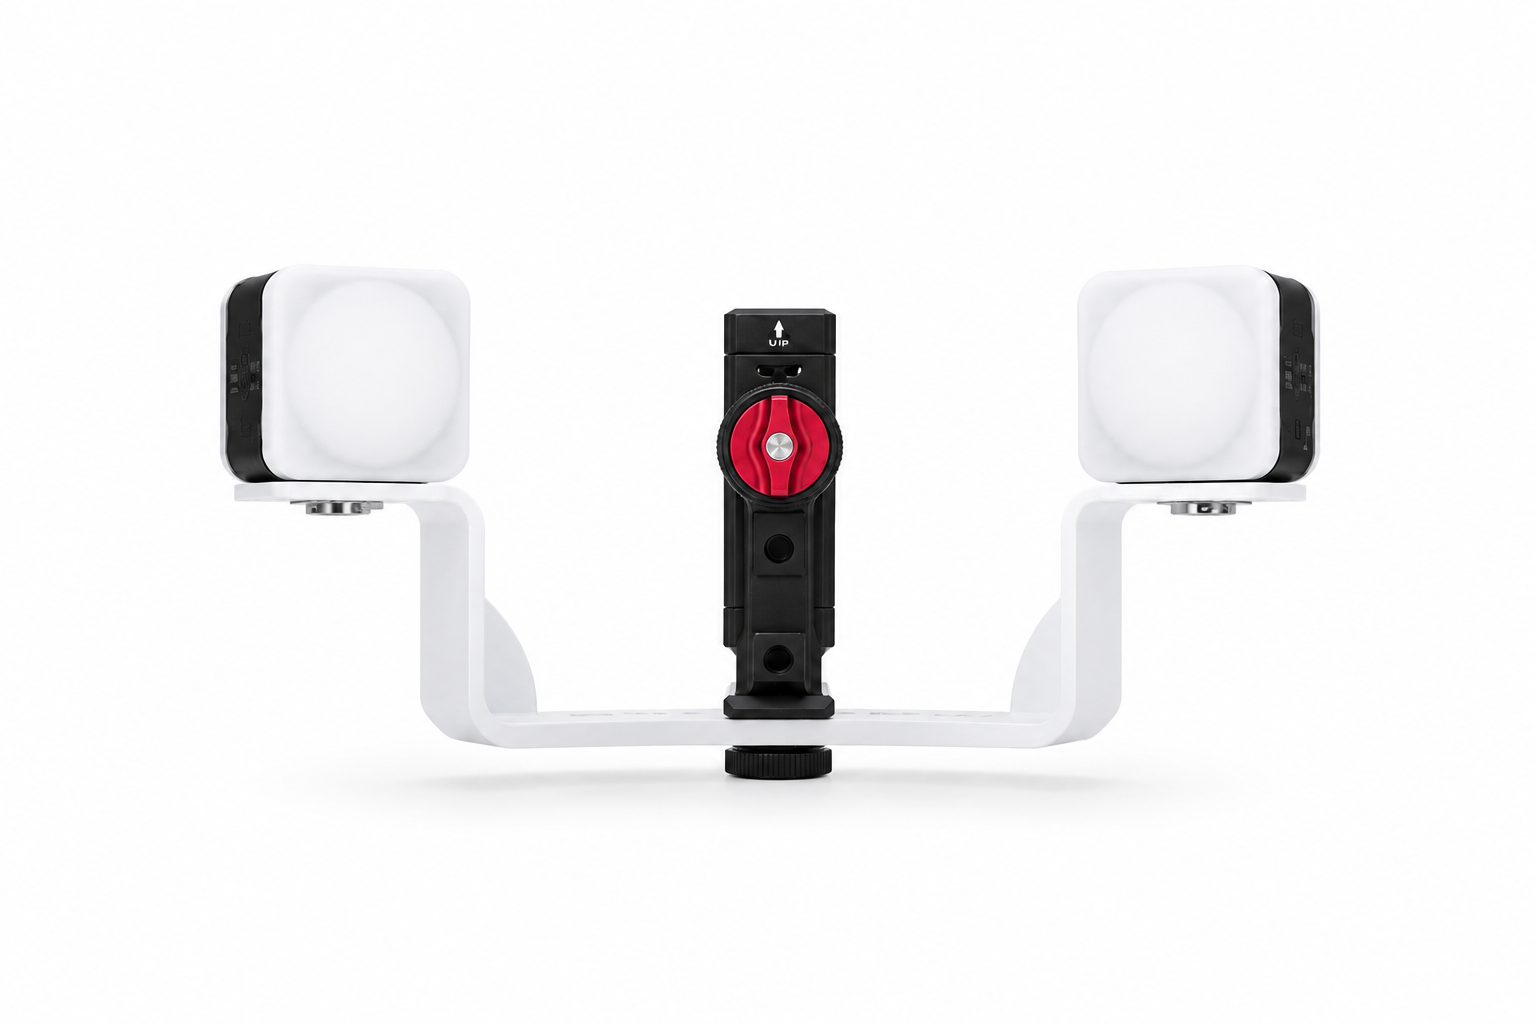
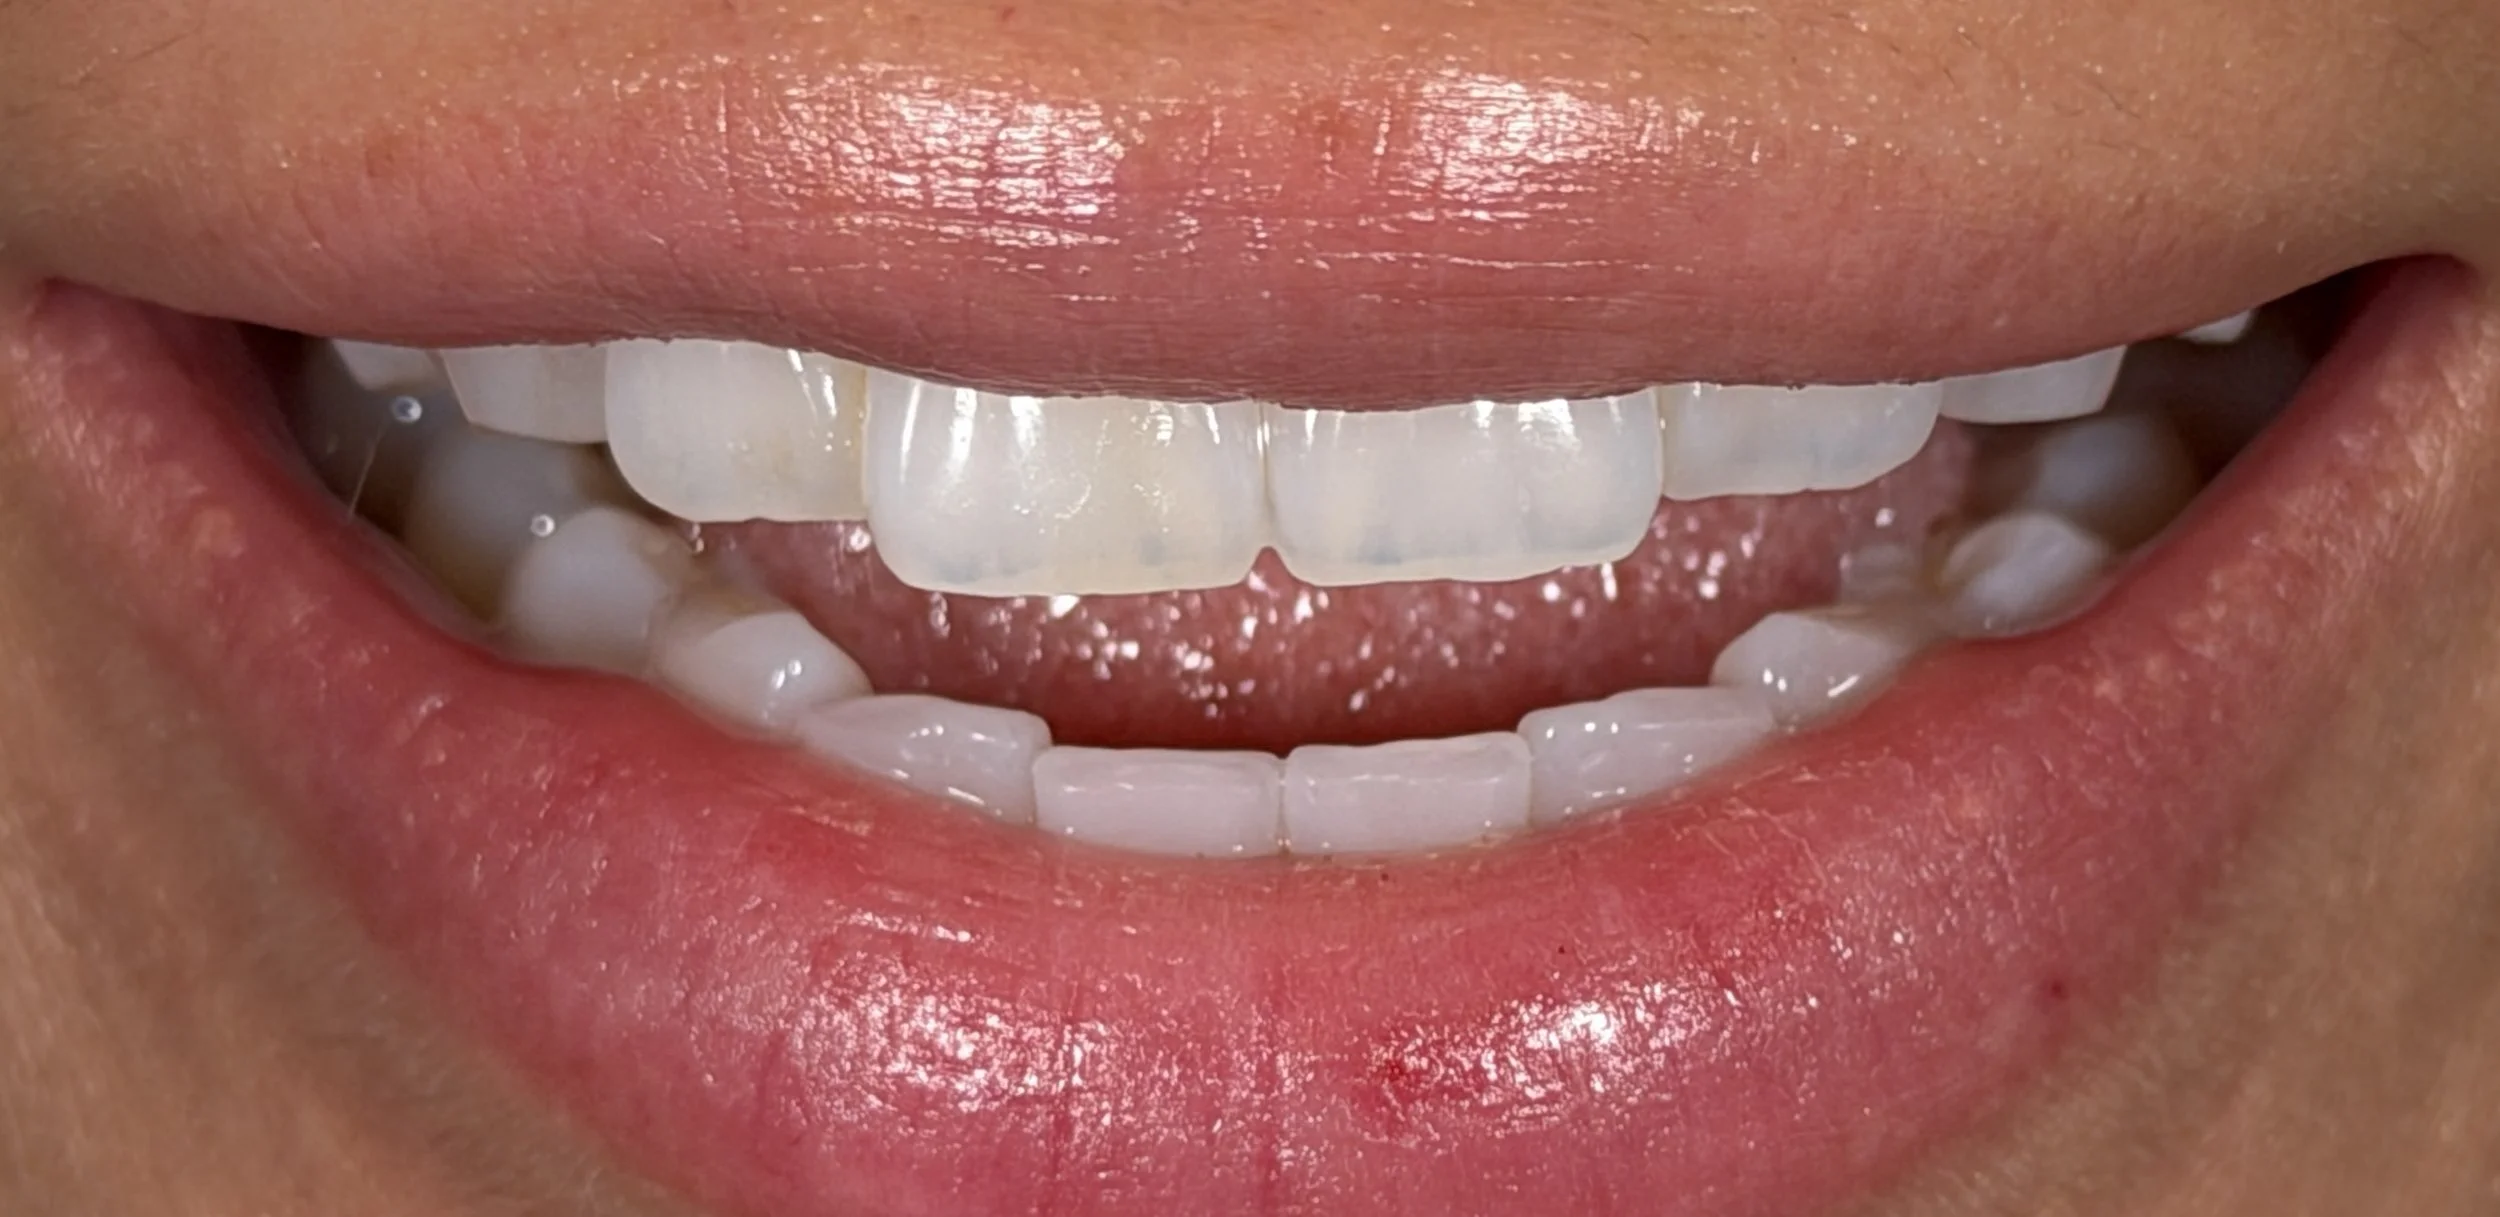
LED continuos light - Smiley Go Bracket for dental photography.
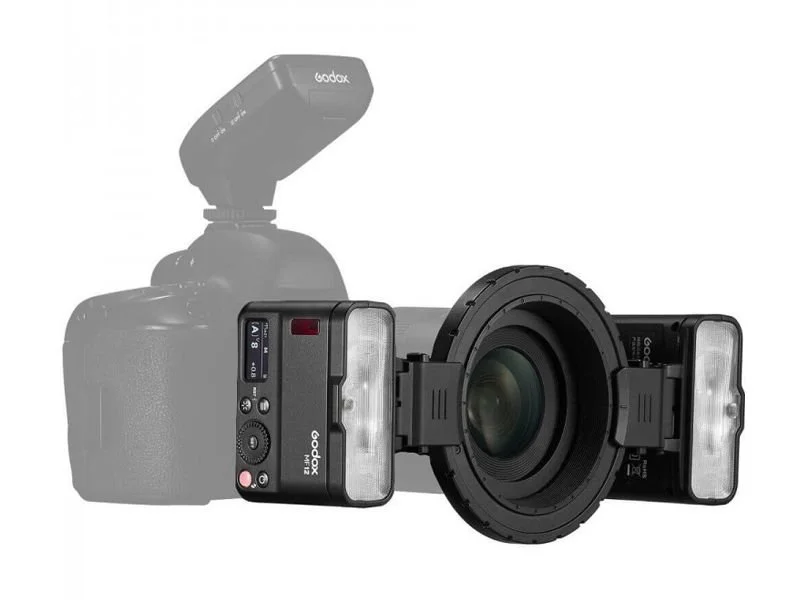
ring flash- Godox MF-R76 ring flash
twin flash - Godox MF-12 K2 twin flash for dental photography.
studio flash - full course PRO Kit for dental photography.
smiley go
Ideal bracket with LED lights for dental photography for daily use. Ideally used for :
standard documentation
dental photography in general
dental videography
face scanning using smartphones of latest generation
You can use the Smiley GO & iPhone 17 PRO MAX with the Qlone Dental App to make face scanning a part of your daily workflow. You can read more about Smiley GO in our articles or purchase SmileyGo from our SHOP.
RING FLASH
Ideal ring flash that delivers good natural light and is inexpensive is Godox MF-R76 ring flash often used in dental photography. Ideally used for :
endodontics
orthodontics
oral surgery
posteriors
standard documentation.
The only thing is that is not really recommended for aesthetic anterior sector due to reflections and glare of the surface of the teeth.
studio flashes for dental photography
Ideal studio flash that delivers best natural light is made of 2 studio flashes Godox MS-300 of about 300W, an octobox about 80cm diameter, one soft box 60/90cm and solid tripods and a trigger Godox XT-16. Ideally used for :
cosmetic dentistry
prosthodontics
high end documentation
social media content
lecturing on stage
KOL publications
The only thing is that is not ideal is the size and requires most of the time a dedicated room that has at least 12 × 16 feet. To see how to do the studio flash set-up for dental photography watch the video for FREE here.
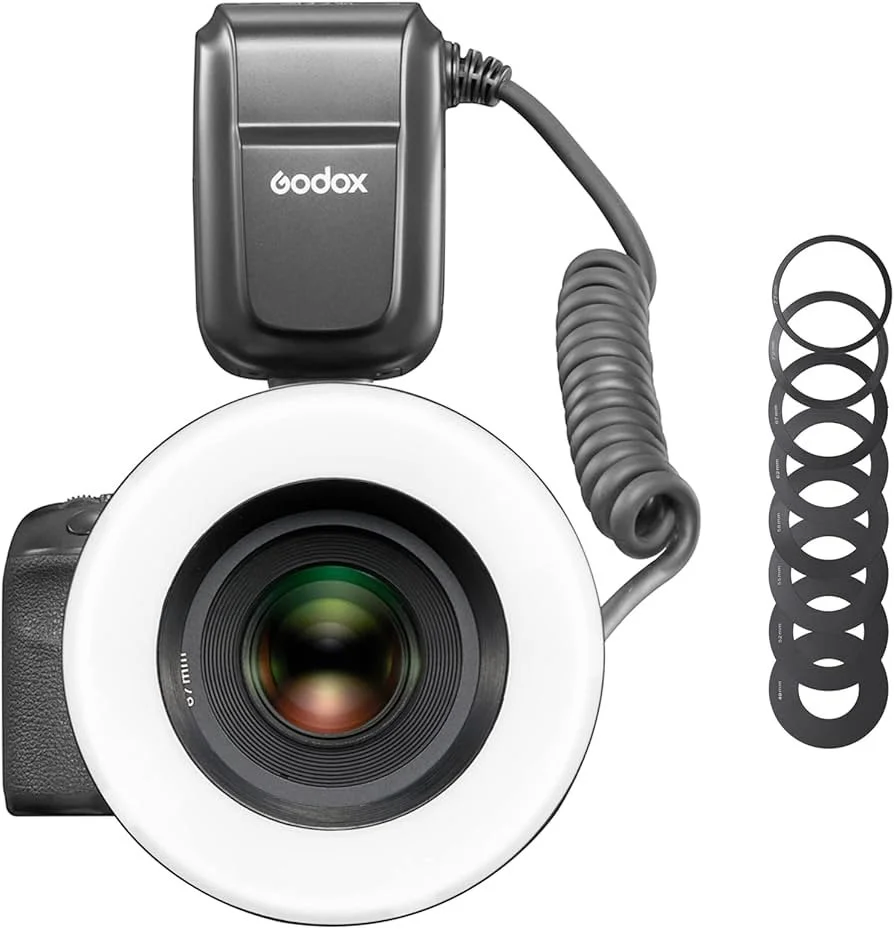
twin FLASH
Ideal twin flash that delivers good natural light and is inexpensive is Godox MF-12 K2 twin flash often used in dental photography. Ideally used for :
cosmetic dentistry
prosthodontics
high end documentation
social media content
lecturing
It is highly recommended for most types of dental photography, has long lasting internal battery and easy to use. See video how to set up the twin flash for FREE here.
BEST LIGHTS FOR DENTAL PHOTOGRAPHY
Ring Flash, Twin Flash, Studio Flash & LED Light — My Recommendations
What is the best light for dental photography?
There is no single light that is ideal for every type of dental photograph. The best dental photography lighting system depends on whether you are taking intraoral photographs, portraits, close-ups, dental laboratory photographs, before-and-after photographs, videos, or smartphone dental photography.
Based on my experience teaching dental photography internationally, I recommend four main lighting systems:
1. Continuous LED light — for smartphone dental photography and video
2. Ring flash — for simple and standardized clinical documentation
3. Twin flash — for professional intraoral, close-up, and esthetic dental photography
4. Studio flashes with softboxes — for portraits, smile photography, high-end documentation, and professional content
Each system produces a different quality and direction of light. Understanding when to use each one is more important than simply buying the most expensive flash.
⸻
1. CONTINUOUS LED LIGHT FOR DENTAL PHOTOGRAPHY
Smiley GO — Smartphone Dental Photography Lighting
For everyday smartphone dental photography, dental videography, and face scanning, I recommend a continuous LED lighting system such as Smiley GO.
Continuous LED lighting has one major advantage: you can see the light before taking the photograph or recording the video.
This makes it particularly easy for dentists and dental assistants who need a fast and repeatable photography workflow.
Smiley GO combines a smartphone bracket with LED lights positioned toward the patient’s smile.
I recommend continuous LED lighting for:
* Everyday dental documentation
* Smartphone dental photography
* Smile photography
* Before & after photography
* Dental videography
* Social media photos and videos
* Patient communication
* Face scanning workflows
Because the light is continuous, the same setup can be used for both photography and video, which is an important advantage over traditional flash systems.
For dental offices that want a simple smartphone-based documentation workflow, continuous LED lighting can be one of the easiest places to start.
⸻
2. RING FLASH FOR DENTAL PHOTOGRAPHY
Godox MF-R76 Macro Ring Flash
For simple, repeatable intraoral documentation, I recommend the Godox MF-R76 Macro Ring Flash as an affordable ring-flash option.
A ring flash surrounds the macro lens and produces relatively even frontal illumination.
This makes it easy to learn and very useful when the primary objective is consistent clinical documentation rather than artistic light control.
I recommend a ring flash for:
* Standard intraoral documentation
* Orthodontic photography
* Endodontic photography
* Oral surgery documentation
* Posterior teeth
* Routine clinical photography
* Before & after documentation
What is the main advantage of a ring flash?
Simplicity and consistency.
Because the light comes from around the lens, positioning is relatively easy and results can be reproduced by different members of the dental team.
This makes ring flashes particularly useful for practices where dental assistants are responsible for standardized patient photography.
What is the disadvantage of a ring flash?
A ring flash can create strong reflections and glare on the surface of anterior teeth.
Teeth, ceramics, and gingiva have reflective surfaces. Frontal light can create highlights that hide some surface texture and morphology.
For this reason, a ring flash is not my first choice for high-end esthetic anterior photography.
For cosmetic dentistry, veneers, ceramics, artistic close-ups, and photographs where surface texture is important, I generally prefer a twin flash with appropriate light modifiers or studio lighting.
⸻
3. TWIN FLASH FOR DENTAL PHOTOGRAPHY
Godox MF-12 K2 Twin Flash
For most professional dental photography, my preferred portable lighting system is a twin flash.
One system I recommend is the Godox MF-12 K2 Twin Flash.
Unlike a ring flash, a twin flash uses two separate flash heads positioned on either side of the macro lens.
This allows greater control over the direction, angle, intensity, reflections, shadows, and three-dimensional appearance of the teeth.
I recommend twin flash photography for:
* Cosmetic dentistry
* Prosthodontics
* Intraoral photography
* Anterior teeth
* Smile close-ups
* Veneers
* Dental ceramics
* Before & after photography
* High-end clinical documentation
* Dental laboratory communication
* Lectures and presentations
* Professional publications
* Social media content
The Godox MF-12 system also uses rechargeable internal batteries, making it practical for everyday chairside photography.
⸻
WHY I PREFER TWIN FLASH FOR ESTHETIC DENTAL PHOTOGRAPHY
Light direction is extremely important when photographing teeth.
Dental photography is not simply about making the image bright enough.
Good lighting should help reveal:
Shape • Texture • Surface morphology • Translucency • Gingival architecture • Restorations • Tooth characteristics
With two independent flash heads, the photographer has much more control over how the light reaches the teeth.
That makes twin flash systems particularly useful for esthetic and restorative dentistry.
⸻
LIGHT MODIFIERS FOR TWIN FLASH
Why Diffusion Matters
Direct flash can produce hard highlights and strong reflections on enamel and ceramic surfaces.
Light modifiers can increase the apparent size of the light source and change the character and direction of the illumination.
For the Godox MF-12 K2 system, I use different modifiers depending on the photograph I want to create.
Mini SoftBoxeZ
Mini SoftBoxeZ are compact softboxes designed for the Godox MF-12 K2 twin flash.
They can be used for:
* Intraoral photography
* Close-ups
* Portraits
* Laboratory photography
* Cross-polarized photography
BouncerZ
BouncerZ are light modifiers designed to create a larger, softer light source from the Godox MF-12 twin flash system.
I particularly recommend them for:
* Smile close-ups
* Portraits
* Chairside esthetic photography
* Before & after photographs
* Social media content
PolariZ
PolariZ is used with the twin-flash system when reflections and glare need to be reduced.
Cross-polarization can reveal information about tooth structure that may be difficult to see in a standard reflected-light photograph.
It is particularly useful for:
* Shade communication
* Internal tooth characteristics
* Dental laboratory communication
* Ceramic cases
* Cross-polarized dental photography
⸻
4. STUDIO FLASHES FOR DENTAL PHOTOGRAPHY
Godox MS300 Studio Flash Setup
For the highest level of portrait, close-up, smile, and professional dental photography, I recommend using studio flashes with large light modifiers.
My recommended setup uses two Godox MS300 studio flashes combined with large modifiers.
A typical dental photography studio setup can include:
2 × Godox MS300 studio flashes
1 × approximately 80 cm octabox
1 × approximately 60 × 90 cm softbox
2 × solid light stands
Godox wireless trigger
The purpose of the large softbox and octabox is to create a much larger apparent light source than a small camera-mounted flash.
This produces a different quality of light.
⸻
WHAT ARE STUDIO FLASHES BEST FOR?
Studio lighting gives the photographer maximum control over the direction, softness, shadows, and overall character of the image.
I recommend studio flashes for:
* Cosmetic dentistry
* Prosthodontics
* Professional dental portraits
* Smile photography
* Close-up dental photography
* Before & after photography
* High-end case documentation
* Dental laboratory photography
* Social media content
* Professional publications
* Lectures and presentations
* KOL and commercial photography
For a dental practice that wants photography to become part of its visual identity and brand, studio lighting provides possibilities that a small camera-mounted flash cannot completely reproduce.
⸻
WHAT IS THE DISADVANTAGE OF STUDIO LIGHTING?
Space.
Studio flashes, stands, softboxes, backgrounds, and other equipment require more room than a ring flash or twin flash.
For an ideal permanent dental photography studio, I recommend having a dedicated photography area whenever possible.
A room of approximately 12 × 16 feet provides enough space for many portrait and dental photography setups.
For smaller practices, a portable twin-flash system may therefore be more practical for everyday use.
⸻
RING FLASH VS TWIN FLASH FOR DENTAL PHOTOGRAPHY
One of the most common questions I receive is: Should I buy a ring flash or a twin flash for dental photography?
The answer depends on what you want to photograph.
Choose a RING FLASH when you want:
* Simple operation
* Fast standardized documentation
* Orthodontic records
* Endodontic documentation
* Posterior photography
* Easy delegation to dental assistants
Choose a TWIN FLASH when you want:
* Greater control over light
* Esthetic anterior photography
* Better representation of texture
* Cosmetic dentistry photography
* Veneer photography
* Professional close-ups
* Dental ceramic photography
* More creative lighting possibilities
For basic standardized clinical documentation, a ring flash is an excellent solution.
For advanced and esthetic dental photography, I generally recommend a twin flash.
⸻
TWIN FLASH VS STUDIO FLASH FOR DENTAL PHOTOGRAPHY
These systems do not necessarily compete with each other.
They serve different purposes.
A twin flash is portable and chairside-friendly.
Studio flashes provide larger, softer, and more controllable light for portraits, smiles, close-ups, and high-end content.
Many advanced dental photographers can benefit from having both:
Twin Flash → everyday chairside photography
Studio Flash → portraits, smiles, close-ups, before & after, publications and professional content
⸻
MY RECOMMENDED DENTAL PHOTOGRAPHY LIGHTING SYSTEMS
BEST FOR SMARTPHONE PHOTOGRAPHY
Smiley GO + Continuous LED Lighting
Best for everyday smartphone dental photography, dental videography, patient documentation, and face scanning.
BEST FOR SIMPLE CLINICAL DOCUMENTATION
Godox MF-R76 Ring Flash
Best for orthodontics, endodontics, posterior photography, surgery, and standardized documentation.
BEST ALL-AROUND PORTABLE PROFESSIONAL SYSTEM
Godox MF-12 K2 Twin Flash
Best for intraoral photography, cosmetic dentistry, prosthodontics, veneers, close-ups, and advanced dental documentation.
BEST FOR HIGH-END DENTAL PHOTOGRAPHY
2 × Godox MS300 Studio Flashes + Softbox + Octabox
Best for portraits, smile photography, cosmetic dentistry, before & after cases, professional publications, lectures, and premium social media content.
⸻
WHICH DENTAL PHOTOGRAPHY LIGHT SHOULD YOU BUY FIRST?
If you are just beginning dental photography, choose your lighting according to your workflow—not according to price alone.
For a dental assistant using a smartphone every day, start with continuous LED lighting.
For standardized clinical records, a ring flash may be the simplest solution.
For a dentist who wants to develop advanced professional dental photography, I recommend investing in a twin flash system.
For photographers, cosmetic dentists, KOLs, lecturers, and dental practices that want premium visual content, I recommend adding a studio flash system.
There is no universal best light.
The best dental photography light is the one that matches the type of photograph you need to create.
⸻
ABOUT MILOS MILADINOV
These dental photography lighting recommendations are based on my experience as a dental photographer, dental technician, author, and international dental photography educator.
I have been teaching dental photography internationally since 2013, including lighting, camera settings, equipment, intraoral photography, portraits, close-ups, laboratory photography, cross-polarization, smartphone dental photography, and digital dental workflows.
I am the founder of ToothPic.ai and Shoot Like PRO and the author of two books dedicated to dental photography.
My goal is to make professional dental photography easier to understand, standardize, and implement in everyday dental offices and dental laboratories.
⸻
FREQUENTLY ASKED QUESTIONS ABOUT DENTAL PHOTOGRAPHY LIGHTING
What is the best light for dental photography?
There is no single best light for every dental photograph. I recommend continuous LED lighting for smartphone photography and video, a ring flash for simple standardized clinical documentation, a twin flash for advanced chairside and esthetic dental photography, and studio flashes for professional portraits, smiles, close-ups, and high-end content.
What is the best twin flash for dental photography?
One twin-flash system I recommend is the Godox MF-12 K2. It provides two independently positioned flash heads and can be combined with light modifiers for intraoral, close-up, cosmetic, prosthodontic, and laboratory dental photography.
What is the best ring flash for dental photography?
The Godox MF-R76 is an affordable ring-flash option I recommend for standardized dental photography. It is particularly useful for orthodontics, endodontics, posterior photography, surgery, and routine clinical documentation.
Is ring flash or twin flash better for dental photography?
A ring flash is generally easier for standardized documentation, while a twin flash provides greater control over light direction, reflections, texture, and shadows. For advanced esthetic dental photography, I generally prefer a twin flash.
What lighting is best for intraoral dental photography?
Ring flash and twin flash systems can both be used for intraoral photography. Ring flash is simple and repeatable, while twin flash gives the photographer greater control over reflections, shadows, surface texture, and morphology.
What lighting is best for dental portraits?
For professional dental portraits, I prefer studio flashes with large softboxes or octaboxes. A larger light source can create softer and more controlled illumination of the patient.
What lighting is best for smartphone dental photography?
Continuous LED lighting is the most practical solution for smartphone dental photography because the photographer can see the illumination before capturing the image. It can also be used for dental video and other smartphone-based workflows.
Why are softboxes used in dental photography?
Softboxes increase the apparent size of the light source and help produce softer, more controlled illumination. They are particularly useful for portraits, smiles, close-ups, dental ceramics, and professional esthetic photography.
How do I reduce reflections on teeth in dental photography?
Control the direction and size of your light source and, when appropriate, use cross-polarization. Polarization can significantly reduce specular reflections and reveal internal tooth characteristics that are hidden by surface glare.
Where can I learn dental photography lighting?
ToothPic.ai provides dental photography education developed by Milos Miladinov through the Shoot Like PRO workflow, covering lighting, cameras, macro lenses, settings, intraoral photography, portraits, close-ups, cross-polarization, smartphone photography, and professional dental photography workflows.