
best dental photography equipment in 2026
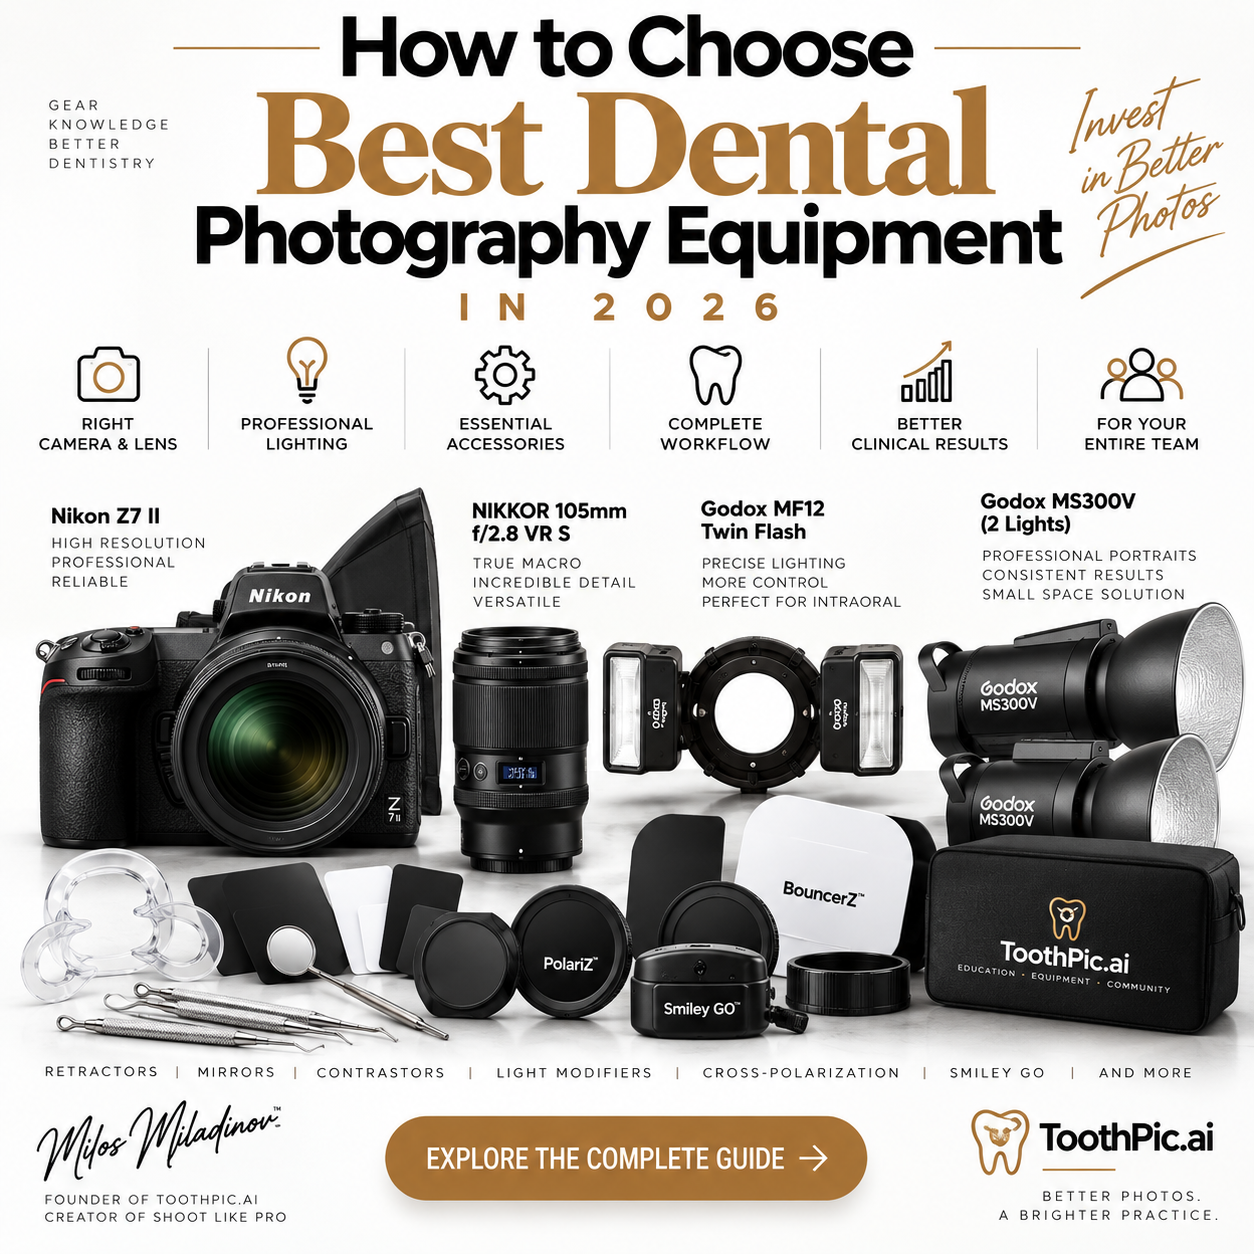
Best Dental Photography Equipment in 2026: My Recommended Setup
By Milos Miladinov | Founder of ToothPic.ai & Creator of the Shoot Like PRO Workflow
After years of teaching dental photography and working with dental professionals around the world, one of the questions I receive most often is:
“What is the best equipment for dental photography?”
There are many cameras, lenses and lighting systems capable of producing excellent results. But if I were building a professional dental photography setup in 2026 and wanted one system capable of handling virtually everything I teach—from intraoral documentation to high-end portraits—this would be my choice.
My Best Dental Photography Setup for 2026
Camera: Nikon Z7 II
My preferred camera body is the Nikon Z7 II.
For dental photography, image quality, detail, consistency and ease of creating standardized workflows are more important to me than simply having the newest camera available.
The Z7 II is a high-resolution full-frame mirrorless body and pairs exceptionally well with Nikon’s professional Z-mount macro system.
For a dental office that wants one serious camera system for clinical documentation, close-ups, portraits, laboratory photography and educational content, this remains one of my favorite choices.
Lens: NIKKOR Z MC 105mm f/2.8 VR S
This is the lens I pair with it.
The NIKKOR Z MC 105mm f/2.8 VR S offers true 1:1 macro reproduction, a 105 mm focal length, f/2.8 maximum aperture and Nikon’s S-Line optics. Nikon also specifically positions the 105 mm focal length for both macro work and portrait photography.
That’s important in dentistry.
With one lens, I can work across:
intraoral photography, close-up dental photography, smile photography, portraits, laboratory photography, shade documentation and detailed macro photography.
For me, the combination of the Nikon Z7 II + NIKKOR Z MC 105mm f/2.8 VR S is an outstanding foundation for a professional dental photography system.
⸻
Best Flash: Godox MF12 Twin Flash
For clinical photography, my preferred setup is a Godox MF12 twin-flash configuration.
Twin flash gives you significantly more creative control over the direction and character of the light than a simple fixed frontal source.
The MF12 units can be positioned independently around the mounting ring, and Godox specifies TTL/manual operation, eight power levels, LED modeling lights and approximately 500 full-power flashes from their rechargeable batteries. Godox also explicitly identifies the MF12 for close-range applications including oral imaging.
I use this type of setup for:
intraoral photography
close-up photography
anterior teeth
texture photography
laboratory work
cross-polarization
creative dental photography
Add proper light modifiers and the difference becomes even greater.
⸻
Studio Lighting: Godox MS300V
Clinical photography is only half of dental photography.
If you want high-end:
patient portraits
smile portraits
before-and-after photography
branding images
team photography
social-media content
I strongly recommend creating a small photography area in the dental office.
My preferred setup uses two Godox MS300V studio lights with appropriate modifiers.
Godox continues to list the MS300V in its current 2026 professional lighting catalog.
Two lights give you a repeatable studio configuration rather than depending on ambient office lighting.
Consistency is the goal.
A patient photographed today should be reproducible six months later with essentially the same lighting, position, background and camera settings.
⸻
Don’t Forget the Accessories
This is where many dental professionals make a mistake.
They spend thousands of dollars on the camera and lens—and then try to save money on everything that actually helps them control the photograph.
A complete dental photography system should also include:
Dental retractors — different shapes and sizes for consistent soft-tissue retraction.
Dental contrastors — particularly useful for anterior and artistic clinical photography.
Intraoral mirrors — essential for standardized occlusal and lateral views.
Flash modifiers / BouncerZ — to modify and soften the light produced by your flash system.
Mini Soft BoxeZ — for more controlled and aesthetically pleasing close-up illumination.
Cross-polarization system / PolariZ — for reducing specular reflections and documenting internal tooth characteristics, color and shade information.
Close-up reflector — useful for controlling light in high-magnification dental images.
Smiley GO — particularly useful when creating standardized smartphone-based dental photography and before-and-after content.
White and black backgrounds — essential for consistent portraits and close-up photography.
Grey/reference cards where appropriate — useful when color consistency is important.
These accessories aren’t extras in my workflow. They are part of the photographic system.
⸻
My Complete 2026 Recommendation
If someone asked me to build a professional dental photography setup today, this is the system I would start with:
Camera: Nikon Z7 II
Macro Lens: NIKKOR Z MC 105mm f/2.8 VR S
Clinical Flash: Godox MF12 twin flash
Portrait/Studio Lighting: 2 × Godox MS300V
Clinical Accessories: mirrors + retractors + contrastors
Light Modification: BouncerZ + Mini Soft BoxeZ
Cross-Polarization: PolariZ
Smartphone Workflow: Smiley GO
Backgrounds: white + black
Education/Settings: Shoot Like PRO workflow
The equipment is important.
But the equipment alone will not make someone a good dental photographer.
⸻
The Most Important Part Isn’t the Camera
I have seen expensive cameras produce poor dental photographs and relatively simple setups produce excellent ones.
Why?
Because workflow beats equipment.
You need to understand:
camera settings
magnification
patient positioning
light direction
retraction
mirror positioning
background selection
flash power
standardization
color management
Once those elements are standardized, dental photography becomes much easier to delegate and reproduce.
That’s the philosophy behind my Shoot Like PRO workflow and the educational system I’ve built through ToothPic.ai.
⸻
One Setup. Multiple Applications.
The advantage of building the system correctly is that the same equipment ecosystem can cover almost every photographic requirement of a modern dental practice.
Clinical documentation → Nikon + 105mm macro + twin flash
Close-up photography → Nikon + macro + modified twin flash
Cross-polarization → Nikon + macro + twin flash + PolariZ
Patient portraits → Nikon + 105mm + two MS300V studio lights
Laboratory photography → Nikon + macro + controlled lighting
Smartphone content → Smiley GO + appropriate lighting
Before & after → standardized settings, positioning and lighting
That’s much better than purchasing unrelated equipment every time you discover a new type of photography.
⸻
My Advice Before You Buy
Don’t start by asking:
“What’s the best camera?”
Start by asking:
“What dental photography workflow do I want my team to reproduce every day?”
Then build the equipment around that workflow.
For my own 2026 professional recommendation, the Nikon Z7 II + NIKKOR Z MC 105mm f/2.8 VR S + Godox MF12 twin flash + two Godox MS300V studio lights, combined with the appropriate ToothPic clinical and lighting accessories, creates an exceptionally capable system for modern dental photography.
The Nikon 105mm’s 1:1 reproduction and macro/portrait versatility are independently documented by Nikon, while Godox’s MF12 system is specifically designed for close-range macro work and is also used within Godox’s dedicated dental-photography ecosystem.